In this multi-part tutorial we’ll be covering two main areas, embedding .Net forms within Maya and extracting Maya UI components and embedding them within your .Net dialogs. To get this to work we will be exploiting the windows messaging system and as a result, this will only work on Windows based systems. This technique is not exclusive to Maya and can be used for many other applications and has saved me on many occasions. Please understand that this tutorial is aimed at intermediate users of .Net and Maya Python scripting, as there will be some C# code used to interface with the windows messaging system and Python code to load the .Net windows within Maya. If you want to learn more about the following concepts you can check out the Addition Resources I have included.
There are some drawbacks to using .Net dialogs within Maya, namely debugging and error handling, so please take this into consideration before implementing it within your pipeline. For this demo I will be using Visual Studio C# Express 2010, but the concepts and code can be used within other software versions.
Also throughout this tutorial I will be referring to C# and Maya Python code that has been condensed to save on space but I have included the full Part 1 source code and solution for your viewing pleasure. When compiling this project you will receive 2 warnings, currently there is a bug with VS 2010 that makes this occur, the solution is correct so please disregard them.
By the end of this multi-part tutorial you will be able to embed your .Net Dialogs within Maya 2012 properly, extract Maya UI components and embed them within your .Net application, and have a basic understanding of windows messaging. Recently Maya’s UI has switched over to Qt, with these changes the code for spawning and finding windows has also.
I have broken the tutorial up into a couple of parts:
- Creating the .Net application
- Connecting Maya with .Net using Python
- Embedding the .Net window within Maya
Creating the .Net application
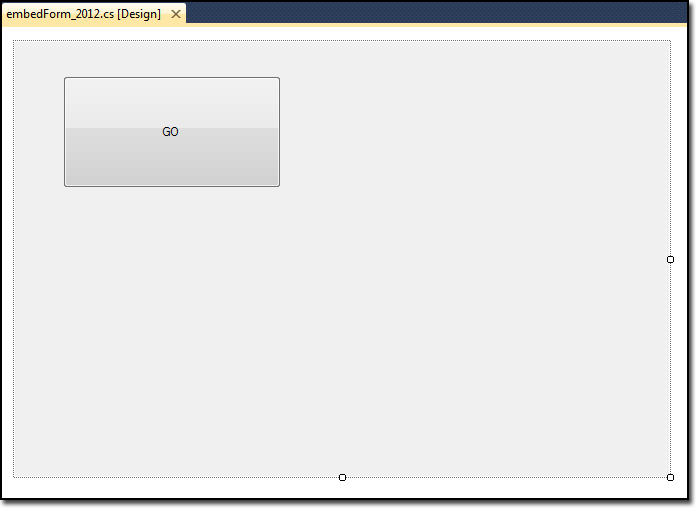
Let’s start by creating a C# (Windows Forms Application) solution; I have created one called MayaUITutorial. I renamed Form1 to embedForm_2012, this will contain code to find a specific Maya window and embed itself into it.
Connecting Maya with .Net using Python
First things first, to run any .Net code within Maya you need to have installed Python.Net for Maya 2012 (Python 2.6) and instead of writing it all out again, my mate Seth Gibson has put together a mid level tutorial just on this: http://tech-artists.org/wiki/PythonNetInMaya If your Python.Net is up and running I would still recommend you take a look at this tutorial and become familiar with the interface.
Now that we have .Net setup and running in Maya, let’s get stuck right into the best bits.
Embedding .Net in Maya
One of the main issues with spawning a .Net window within Maya is having it sort correctly, minimize/maximize with the Maya window and not displaying in the task bar as if it were a separate application. Although this can be done with Windows messaging it can be simplified by parenting the .Net window within a native Maya window. By doing this simple trick you solve the major issues associated with the spawning and destruction of.Net windows. To complete this parenting work around we can use the windows messaging system to our advantage.
Windows, Controls & HWND’s
Every window and control within Windows has a “Windows Handle” or HWND; this is a unique address that identifies the UI and what messages it receives. In addition to this ID each UI has an owner or parent which can also pass messages onto its children e.g. If a parent window is told to minimize then its children will also follow.
Finding a window’s HWND
When a window is created it is assigned a HWND, it is more than extremely rare for a window to have the same ID as when it was last created. To find the correct window that we want to access we need to assign a unique name/ title to it so we can identify it from all the other similar controls. Later on we will be running through some code that will search for this unique window, as part of the function call we will need to include the UI class name. There are a couple of ways to find what a control’s class is; if you have the Professional version of Visual Studio there is a tool called “Microsoft Spy++”, otherwise you can get an app called “Windows Modifier”. For this tutorial we’ll be using Windows Modifier as it has a couple of extra features that we can use to our benefit.
Windows Modifier
Windows Modifier is as the title suggests a tool to modify windows. In addition to investigating the window’s Class and HWND it has the ability to modify the size, state and the parent of a particular window. With this you can test out UI changes and parenting without even writing a line of code.
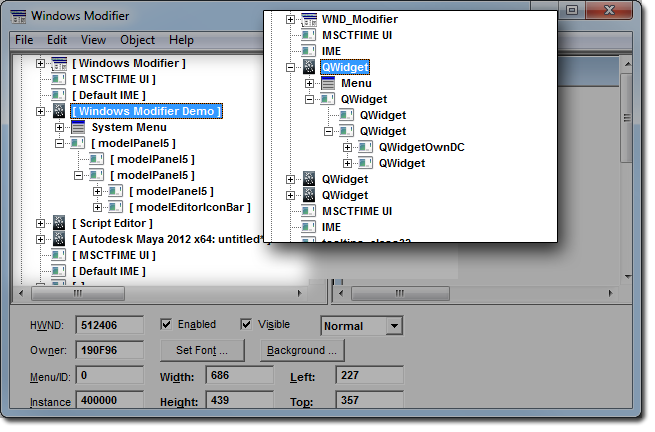
In the image above we can see that Windows Modifier has two ways to display its UI Tree (Window Text and Class Name). When we call the find function within C# we will be using both the text and class name of the selected window to get the correct HWND of the window, so take note we will be using this in the next section.
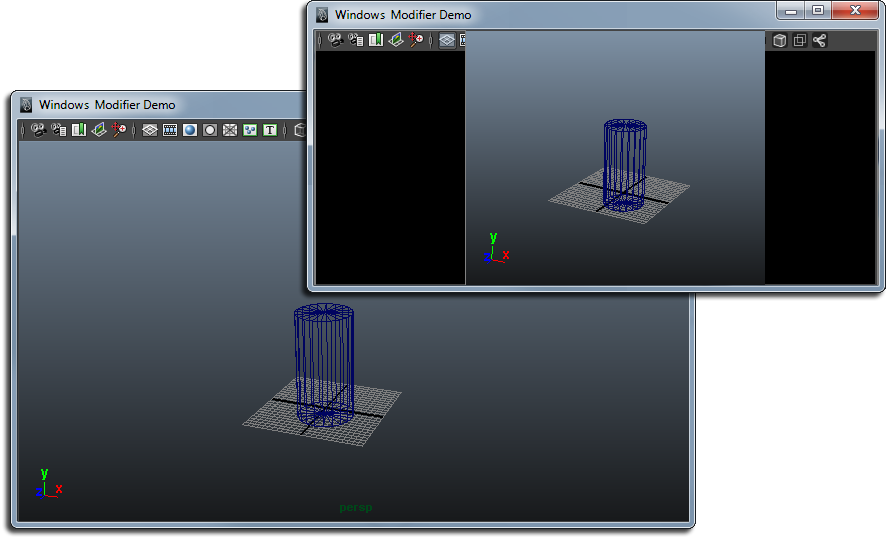
As a side note, in this image we have a Maya window that has had its UI modified as a demonstration of what is possible with windows messaging, after a form has been created. It is quite easy to move elements of a window to fit the needs of your interface. We will be focusing more on this in part 2 of the tutorial.
Alright… enough talking, let’s get stuck into some juicy code.
C# Code used to Parent UI
To embed a .Net window within a Maya window we need to write some code in both C# and Maya. The C# code will be responsible for finding the Maya window and attaching itself within it. Maya will then create the unique window and call the necessary code to initiate the .Net form creation and attachment. Let’s start with the C# code first as it will make things a little clearer down the track.
C# Code References
The following condensed code is taken from the embedForm_2012:
using System.Runtime.InteropServices;
namespace MayaUITutorial
{
    public partial class embedForm_2012 : Form
    {
        // Include SetParent Reference
        [DllImport("User32", CharSet = CharSet.Auto, ExactSpelling = true)]
        internal static extern IntPtr SetParent(IntPtr hWndChild, IntPtr hWndParent);

        // Include hWnd of a selected window references
        [DllImport("user32.dll", SetLastError = true)]
        static extern IntPtr FindWindow(string lpClassName, string lpWindowName);

        [DllImport("user32.dll", SetLastError = true)]
        static extern IntPtr FindWindowEx(IntPtr hwndParent, IntPtr hwndChildAfter, string lpszClass, string lpszWindow);
First of all we need to include System.Runtime.InteropServices to get access to the DllImportAttribue creating references to SetParent (Setting the parent of a particular UI), FindWindow and FindWindowEx (Finding a window’s HWND based on a combination of the window title, class and parent). Using this in conjunction with a unique windows title we are able to get the correct HWND. These imports enable us to use shared unmanaged code within our managed application, or in other words, giving us access to the Windows API (WIN32 API). Take special note of the namespace, there is a current bug within python.net that requires you to have the same namespace as your assembly name.
NB: In the case that you are making multiple instances of your window you will have to pass the unique name to the form at time of creation. For this tutorial however we will assume that the window will not be instanced.
Find and Parent code
The following condensed code is used to search and attach the .Net window within a specifically named Maya window. As we are only looking for the window’s HWND there isn’t an awful lot of code in this example but in the next tutorial we will be digging a little deeper into a window’s components so you’ll get a couple more lines to check out.
public partial class embedForm_2012 : Form
{
    public void Embed_2012_Control()
    {
        //Set the name and Class of the Maya blank window
        string lpszParentClass = "QWidget";
        string lpszParentWindow = "Embed Viewport.NET";

        IntPtr ParenthWnd = new IntPtr(0);

        /* Attach the .Net Form into the Maya blank window */
        ParenthWnd = FindWindow(lpszParentClass, lpszParentWindow);
        SetParent(this.Handle, ParenthWnd);
    }

    private void embed_2012_Form_Load(object sender, EventArgs e)
    {
        Embed_2012_Control();
    }
}
I created a new procedure called Embed_2012_Control and have set it to run on form load. I have set the Parent Class and Parent Window Names based on the information I obtained from Windows Modifier and the unique name I gave my window. FindWindow is then called using this information and the result is a HWND to the Maya window. Now we only need to call SetParent using the .Net Forms HWND (this.Handle) as the child and the Maya window HWND as the parent. We now have a .Net window embedded.
Maya code used to spawn UI
The following code is taken from the Demo_2012.py file; it contains the imports and Embed Class functionality you will need for Part 1 of the tutorial.
# Load all required Modules
import clr
import sys
import threading
import maya.cmds

# Add path to Maya .Net DLL
sys.path.append( ' Path to MayaUITutorial.dll ')

# Add Reference to the .Net Tutorial Runtime Lib
clr.AddReference('MayaUITutorial')
import MayaUITutorial

##############################################################################
## EMBED CLASS
##

class MayaUITutorial_Embed_2012():

    def __init__(self):
        # Create ref .Net embedForm_2012
        self.Form = MayaUI.embedForm_2012()

        # Attach function to Button event
        self.Form.cmdButton.Click += self.cmdButton

    def Show(self):
        # Create and display Maya window for the .Net to attach in
        self.MayaWindow = maya.cmds.window( title='Embed Viewport.NET', iconName='.Net Demo', widthHeight=(350, 250) )
        maya.cmds.showWindow( self.MayaWindow )

        # Spawn and start new thread for .Net window
        formThread = threading.Thread( target = self.Form.Show(), args = () )
        formThread.start()

    def cmdButton(self, *args):
        print 'Cmds Run'
In the above code, I have imported the necessary CLR, SYS and Threading modules. In the __init__ method I created an instance of the embedForm_2012 and connected the event handler for the button on the form. We call the Maya window create and show methods at this point as we need to have a window to attach to, unlike Maya 2009 we need to show the window for it to be created. The core part of this python code is within the Show method, it is very similar to the example shown in Seth’s tutorial except in the thread creation where I have used .Show() instead of .ShowDialog(). We want to have the dialog as a non-modal window ( doesn’t draw exclusive focus, i.e. File Dialogs) so we can have it open constantly while we work.
The creation of this window is the core element of the whole two tutorials. Making sure that this is a unique name is imperative to making it all work. Then we can spawn the window using:
import Demo_2012
MayaUITutorialEmbed_2012_Window = Demo_2012.MayaUITutorial_Embed_2012()
MayaUITutorialEmbed_2012_Window.Show()
And we can get access to the Maya window to modify it using:
maya.cmds.window( MayaUITutorialEmbed_2012_Window.MayaWindow, edit=True, widthHeight=(150, 170) )Additional Resources
What is Managed / UnManaged code?
Windows Messaging and Messaging Queues
In Part 2 we will be looking at embedding Maya UI in .Net dialogs.
So stay tuned…